Plugin Information |
|---|
View LoadNinja on the plugin site for more information. |
What is LoadNinja?
LoadNinja is a cloud-based load testing and performance testing platform for web applications. It helps developers, QA teams, and performance engineers check if their web servers sustain a massive load and if the servers are robust and scalable.
Install plugin
Install this plugin in the Jenkins plugin manager.
Tip: To post test results as Zephyr items, also install the Zephyr for JIRA Test Management plugin.
Add LoadNinja tests to your builds
To run a LoadNinja test as part of your build, configure the needed build:
- In Jenkins, select a job and click Configure.

- In the Build section, click Add build step > LoadNinja. This step is added by the LoadNinja Load Testing Plugin.

Specify the LoadNinja settings for this build:
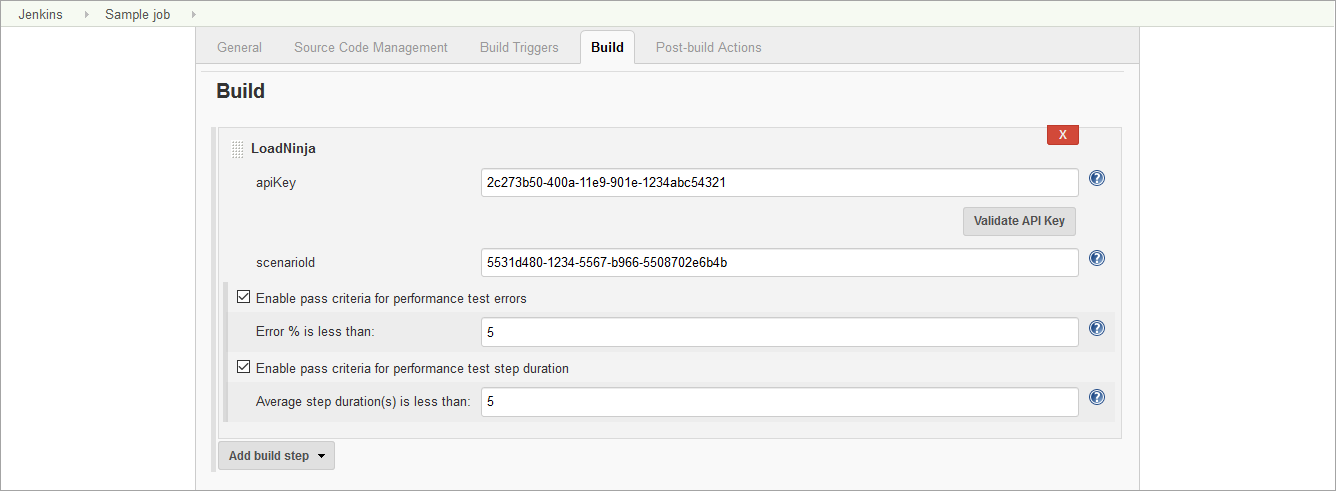
Option Description apiKey The unique LoadNinja API key of your account that is available in the LoadNinja settings dialog.
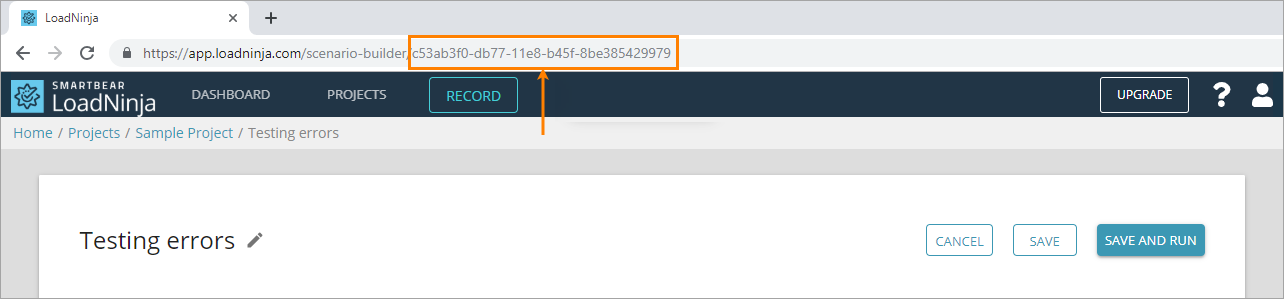
After you enter the key, click Validate API key to check whether Jenkins can access LoadNinja using the key.scenarioId The unique ID of the load test scenario you want to run. You can get it from the API or scenario URL:
(Optional) To command Jenkins to mark a test as passed only if the percentage of errors in this test is less than some value, select the Enable pass criteria for performance test errors check box and specify the desired value in the edit box that appears.
(Optional) To command Jenkins to mark a test as passed only if the average duration of a test step during the run is less than some value (in seconds), select the Enable pass criteria for performance test step duration check box and specify the desired value in the edit box that appears.
In the Post-build Actions section, click Add post-build action and select Publish JUnit test result report to receive a JUnit XML report. Make sure to specify the name of the target file for reports in the Test report XMLs field.

Tip: To publish the load test results as a Zephyr item in JIRA, configure the Zephyr plugin and select the corresponding post-build action in Jenkins. To learn more, see the LoadNinja documentation.
Click Save.
Usage notes
- When a LoadNinja test is running, the plugin posts the current status of the test run to the Jenkins console output every 1 minute.